Laboratory Notebook
1 Basic Information
- Course: CHEM UN3085 PHYSICAL AND ANALYTICAL CHEMISTRY LABORATORY I
- Experiment No.: 3
- Title: Calorimetric Determination of Enthalpy of Combustion: A Study of Butanol Isomers and Ring Strain
- Date: Sep 23 2025
2 Objective
This experiment aims to measure and calculate the ring strain energy in the cyclobutanol molecule using bomb calorimetry. We will accurately determine the respective molar enthalpies of combustion () for three alcohols (1-butanol, 2-butanol, and cyclobutanol), and then determine the final ring strain by comparing the differences in these enthalpies.
3 Materials & Equipment
Thermistor-coupled MicroLAB ADC,
Thermocouple,
Parr Bomb Calorimeter.
Oxygen Bomb
1-Butanol:
2-Butanol:
Cyclobutanol:
Benzoic Acid Standard
Gelatin Capsules
Ignition Wire:
4 Procedure
Part 1 Assembling the Bomb Calorimeter
Step 1
Cut the iron wire to a suitable length (ensuring there are no sharp bends) and weigh it precisely (in grams).
Step 2
Prepare the substance to be tested (approximately 0.8 g of a benzoic acid pellet, or approximately 0.4 g of liquid butanol carefully added to a gelatin capsule).
Step 3
Use the current from a 1.5V dry cell battery to heat the iron wire and fuse it into the substance. Gently blow on the wire to prevent overheating. The pellet or capsule should be centrally located.
Step 4
Carefully weigh the sample after it has been fused with the iron wire.
Step 5
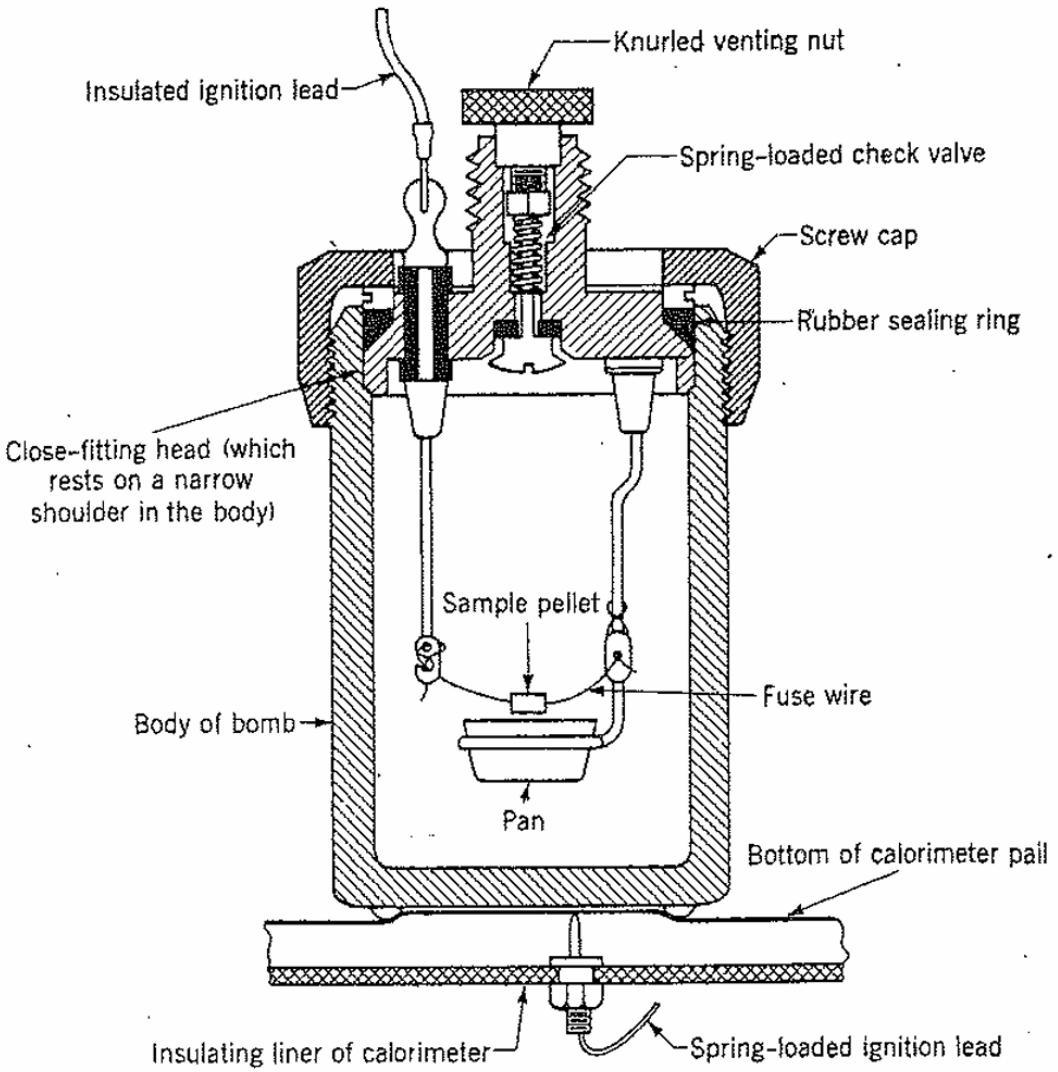
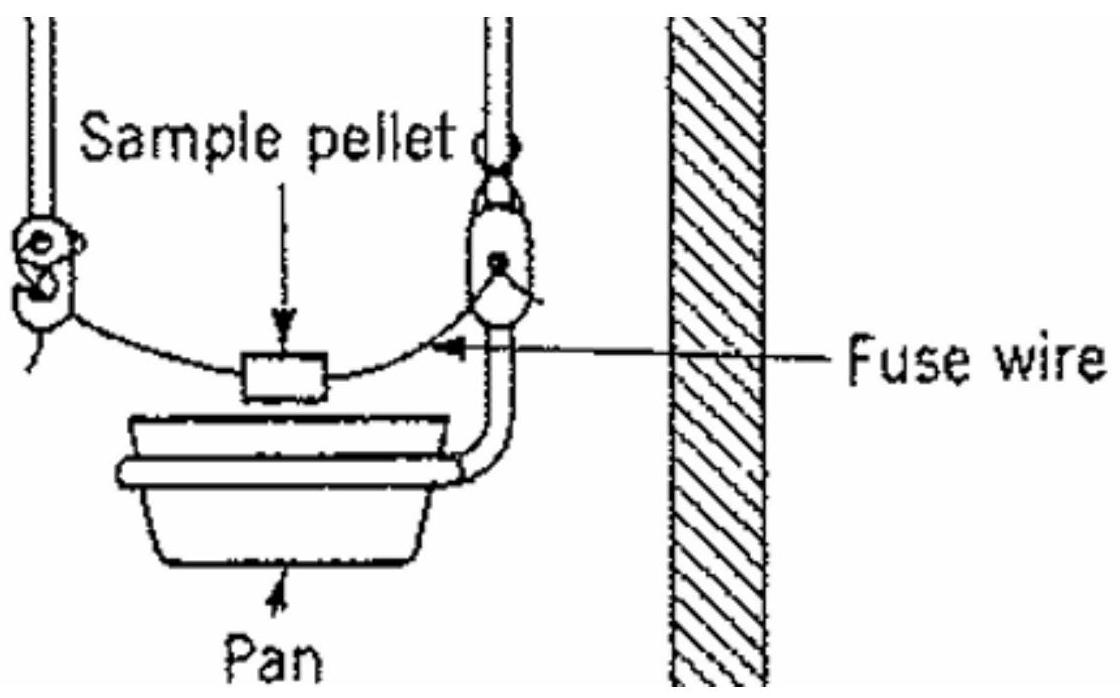
Carefully install the sample and wire. The sample should be positioned directly above the crucible, and the wire should only touch the electrodes.
Step 6
Carefully assemble the oxygen bomb and tighten the screw cap by hand (do not use a wrench).
Step 7
Connect the bomb to the oxygen filling apparatus, carefully aligning the connection before tightening. a. Carefully open the main oxygen supply valve and slowly fill the bomb to 380 psi (do not exceed 450 psi). b. Release the pressure in the bomb to flush out any atmospheric nitrogen. c. Refill the bomb to 380 psi.
Step 8
Immerse the bomb in water and check carefully for leaks. If a leak is present, vent the bomb, loosen and slightly rotate the bomb head, retighten the screw cap, and repeat step 7. One bubble every seconds is insignificant.
Step 9
Wipe the bomb dry, place it in the dry bucket, and then place the bucket into the calorimeter, ensuring it is centered and not touching the inner walls.
Step 10
Connect the electrodes on top of the bomb and ensure the connection is tight.
Step 11
Fill a 2-liter flask with water at 25°C. Carefully pour the water into the bucket and let it drain for about 30 seconds. a. A convenient way to prepare the water is to use both hot and cold water, mixing them as needed while shaking and checking with a thermometer until the flask is full.
Step 12
Place the lid on the calorimeter and clamp the precision thermometer as low as possible without obscuring the scale. Ensure the clamp is not too tight. The temperature in the bucket should be within plus or minus half a degree of 25°C.
Step 13
With all switches on the control box off, plug the stirrer and ignition leads into the control box.
Step 14
Plug the control box into a power outlet.
Step 15
Briefly turn on the stirrer to ensure it runs smoothly.
 Figure 1
Bomb calorimeter (Parr design), showing its insulating jacket, which can also serve as a dead-air insulating jacket when empty. The precision mercury thermometer may be replaced by a high-resolution resistance thermometer or a calibrated thermistor.

Figure 2 Parr single-valve oxygen bomb, shown in contact with the bottom of the calorimeter bucket. One electrical contact is made automatically to the body of the bomb through the bucket. The bomb should be mounted on an assembly stand while the sample is being loaded.

Figure 3 The sample burns in a small metal crucible
Part 2 Conducting the Experiment
Step 1
Every 30 seconds, record the time and the temperature displayed on the thermometer to the nearest .001°C. a. Tap the thermometer before each reading. Do not interrupt these readings until the experiment is over. Be sure to record time and temperature data every 30 seconds.
Step 2
The temperature of the calorimeter bucket should rise at a very linear rate (approximately .001°C per minute). Ensure this steady linear increase continues for 5 minutes.
Step 3
Turn the ignition switch on and then immediately off to fire the bomb. Record the exact time this occurs. a. The indicator light may give a single brief, dim flash, indicating that current has passed to burn out the iron wire. b. The burning wire will ignite the sample, and the temperature will rise after seconds. c. After a few minutes, the bucket temperature should return to a slow and steady increase. d. Do not stop the time and temperature measurements. These should be continued until the total time after firing is at least times the time it took to return to a steady rate.
Step 4
After the readings are complete, turn off all switches and unplug the unit.
Part 3 After the Experiment
Step 1
Disassemble the apparatus, carefully release the pressure from the bomb, and open the bomb.
Step 2
Remove and weigh any unburned iron wire. a. Ignore the 'little balls' unless, on attempting to crush them, they are found to be fused metal rather than oxide.
Step 3
Subtract the weight of the unburned wire from the original weight of the wire to get the weight of the wire burned (in grams).
Step 4
If the inside of the bomb is coated with soot/black powder, it indicates there was insufficient oxygen for complete combustion at the time of ignition, and the run should be discarded.
Step 5
Wipe all bomb parts clean.
5 Raw Data Table
Table 0: Experimental Conditions and Constants
- Lab Ambient Temperature (T_ambient): __________ °C = __________ K
- Gas Constant Used (R): 8.314 J·mol⁻¹·K⁻¹
- Molar Mass of 1-Butanol/2-Butanol (): 74.12 g/mol
- Molar Mass of Cyclobutanol (): 72.10 g/mol
- Specific Energy of Combustion for Gelatin Capsules (): 4600 cal/g
Table 1: Determination of the Calorimeter Energy Equivalent (Using Benzoic Acid Standard)
| Run | Mass of Benzoic Acid (g) |
Initial Wire Mass (g) |
Final Wire Mass (g) |
Wire Mass Difference (g) |
Corrected Temp Rise (°C) |
Total Heat (kJ) |
Heat from Wire (kJ) |
Heat from BA (kJ) |
Energy Equivalent (kJ/°C) |
|---|---|---|---|---|---|---|---|---|---|
| 1 | |||||||||
| 2 | |||||||||
| Average |
Table 2: Determination of the Enthalpy of Combustion for Butanol Isomers
| Sample | Run | Capsule Mass |
Sample + Capsule Mass |
Sample Mass |
Initial Wire Mass |
Final Wire Mass |
Total Heat |
Capsule Heat |
Sample Heat |
Moles of Alcohol |
|||
|---|---|---|---|---|---|---|---|---|---|---|---|---|---|
| (g) | (g) | (g) | (g) | (g) | (°C) | (cal) | (cal) | (cal) | (mol) | (cal/mol) | (cal/mol) | ||
| 1-Butanol | 1 | ||||||||||||
| 2 | |||||||||||||
| 3 | |||||||||||||
| 2-Butanol | 1 | ||||||||||||
| 2 | |||||||||||||
| 3 | |||||||||||||
| Cyclobutanol | 1 | ||||||||||||
| 2 | |||||||||||||
| 3 |
For Temperature Rise (°C):
| Ignition Time |
Ignition Temperature |
Final Time |
Final Temperature |
Initial Drift Rate |
Final Drift Rate |
Area Equivalence Time |
|---|---|---|---|---|---|---|
| s | °C | s | °C | °C/s | °C/s | s |